by Kevin OBrien on June 4, 2012
HOW DO I ADD/ DELETE/ MODIFY ALBUMS WITHIN ALBUM PLAYER?
We decided to throw up a little tutorial on how to modify albums within our favorite computer audio playback software suite, Album Player. Adding albums, deleting albums, as well as modifying existing albums within the Album Player database can be a little tricky. Let's try to get to the bottom of all of it with some screen shots and explanations. Here we go!
PROPER PREFERENCES SETUP:
First, let's make sure the correct options are checked under the "Settings" menu before we get into how to add albums, etc.
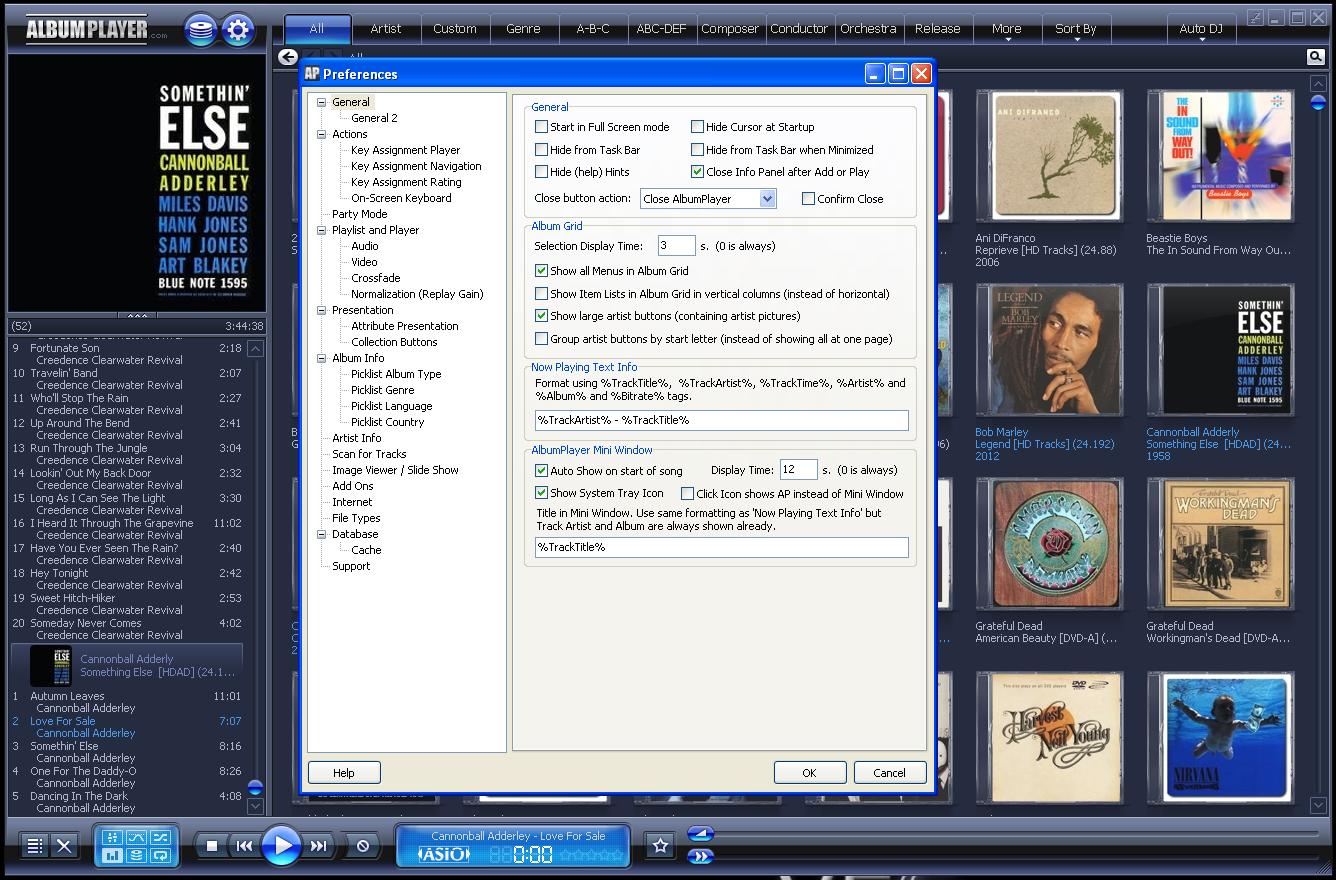
Hit the "Sprocket" or "Gear" button next to the "Stack of Discs" button. It's above the "N" in the "Somethin' Else" cover art in the screen shot below (upper left-hand corner of the window below).
Now your "Preferences" options menu screen will appear as you can see below. You'll have to hit the "Preferences" button to get into the menus to change settings.
The "Preferences" menu is shown below.
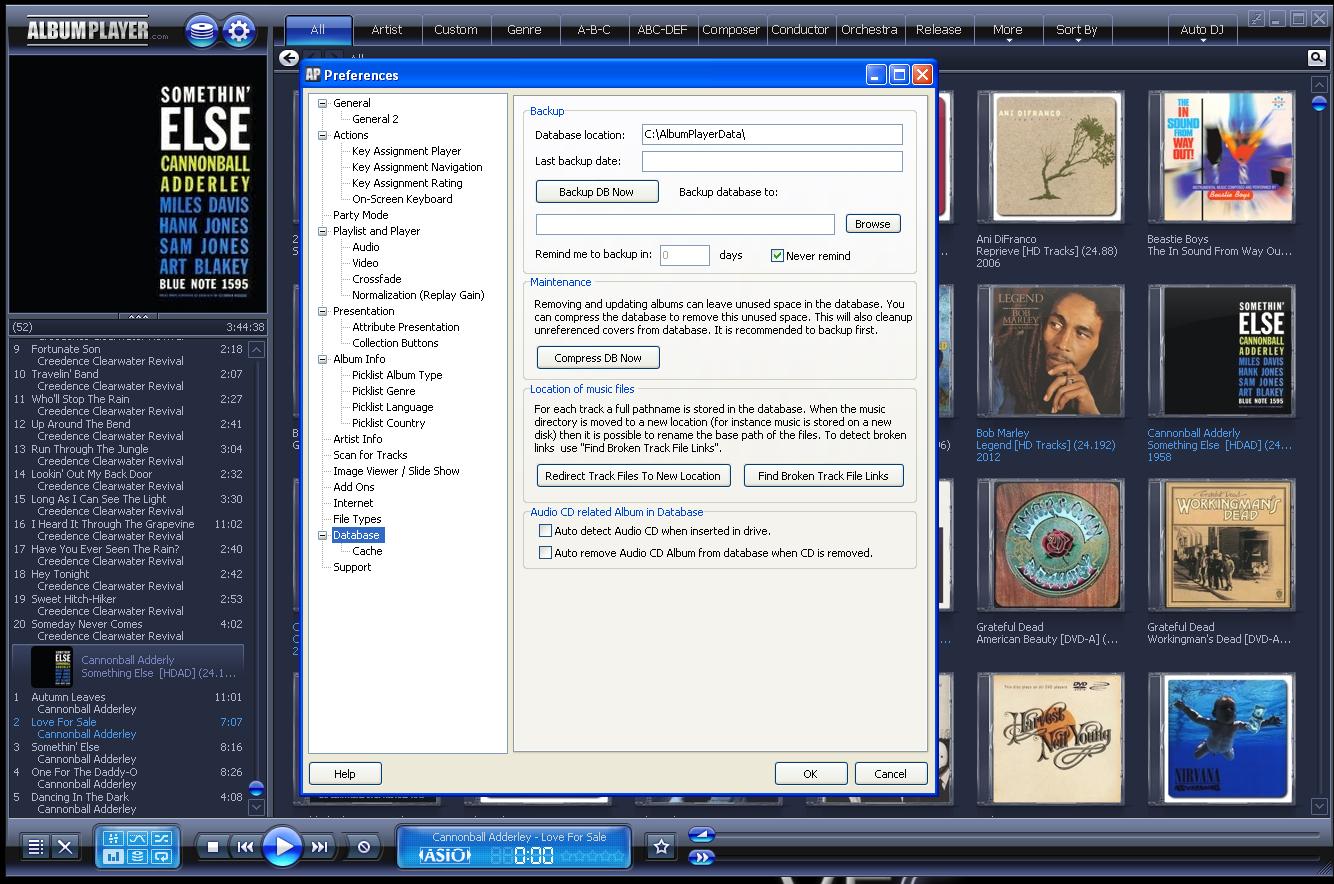
Highlight the "Database" heading under the "Preferences" menu as shown below.
Make sure to UNCHECK the two boxes at the very bottom of the menu screen above that say "Auto detect Audio CD when inserted in drive" as well as "Auto remove Audio CD from database when CD is removed from drive". This can cause some conflicts with EAC when trying to rip. If you prefer to use Foobar 2000 for ripping then you can leave the boxes checked.
NOTE: Check these options if you want Album Player to automatically recognize a CD when you pop it in the tray. You can then add the CD to your 'playlist' and now you're using one of the world's best sounding CD Transports!!! This feature is very handy when you want to listen to a disc without ripping it first. This especially holds true at audio shows, etc when demoing CD's is paramount!!! :-)
You can browse through the rest of the options under the "Preferences" menu and experiment with the settings to personalize the program to your liking.
ADDING ALBUMS:
The next logical spot to begin would be the addition of new music to the AP suite. Album Player is kinda tricky to add and modify music. That's its only downfall in our opinion. You have to pop a disc into your server and then use a program like EAC to rip it to your hard disc in a location where you want your music to live. You can also choose to rip from another machine remotely and then bring in the files from an external hard drive onto your server for instance. This is how we choose to do it.
See our FAQ on ripping
here!
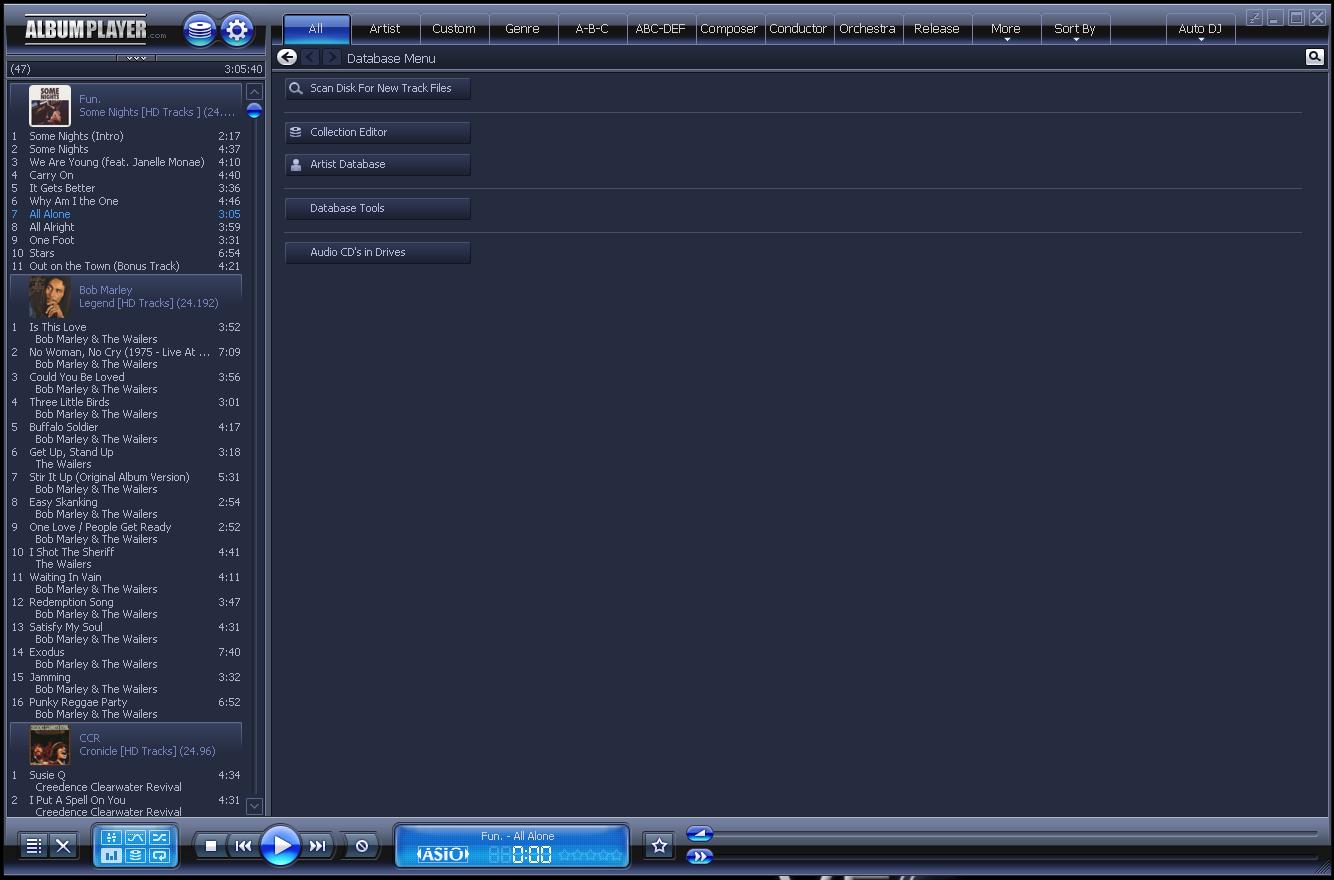
We personally place a folder on our desktop and label it "MUSIC". Then we use EAC to rip our discs to that folder. After you've ripped your discs, you must go into Album Player and hit the "stack of cd's" button near the top of the program window. In our case it's the button right above the first "E" in the Somethin' Else cover art below in the top left hand corner of the window.
Now you have to point the program to the folder where your music lives that you labeled "MUSIC".
Hit the "Scan Disk For New Track Files" button shown below.
The "Scan Albums" window will pop up and then you have to hit the "Browse" button to point AP to your "MUSIC" folder on your desktop.
Every time you add a disc you have to point AP towards the folder you placed it in. The same goes for albums you download from HD tracks. Place them in the same folder on your desktop so all your music is in the same place for convenience. (At least that's how we like to do it)
Below is a shot of the window that pops up after you hit the "Browse" button and you've pointed AP to your music folders.
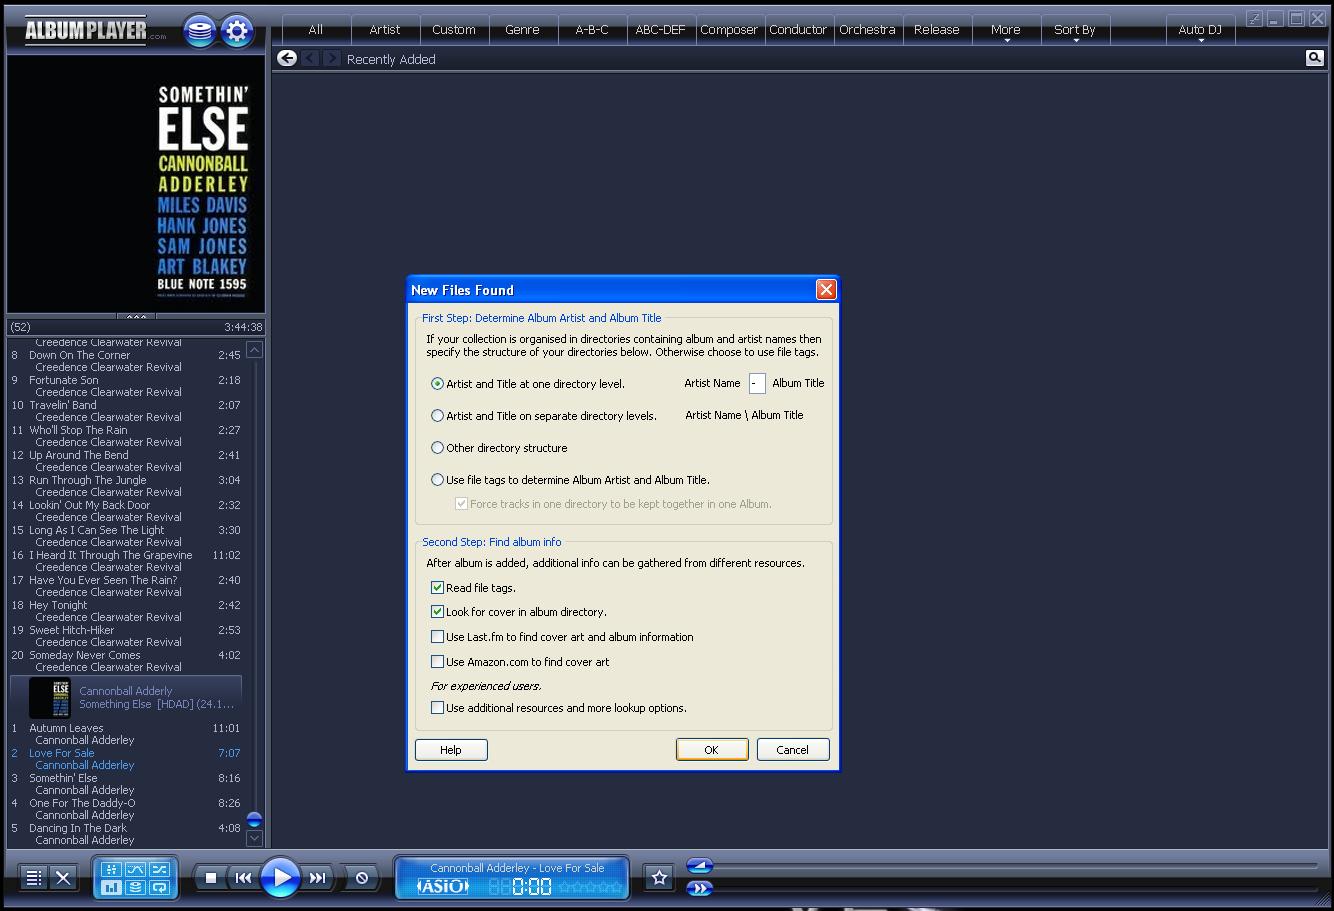
Once you point AP in the direction of your "MUSIC" folder, a "New Files Found" window pops up. Press "OK" to tell AP to start scanning your files.
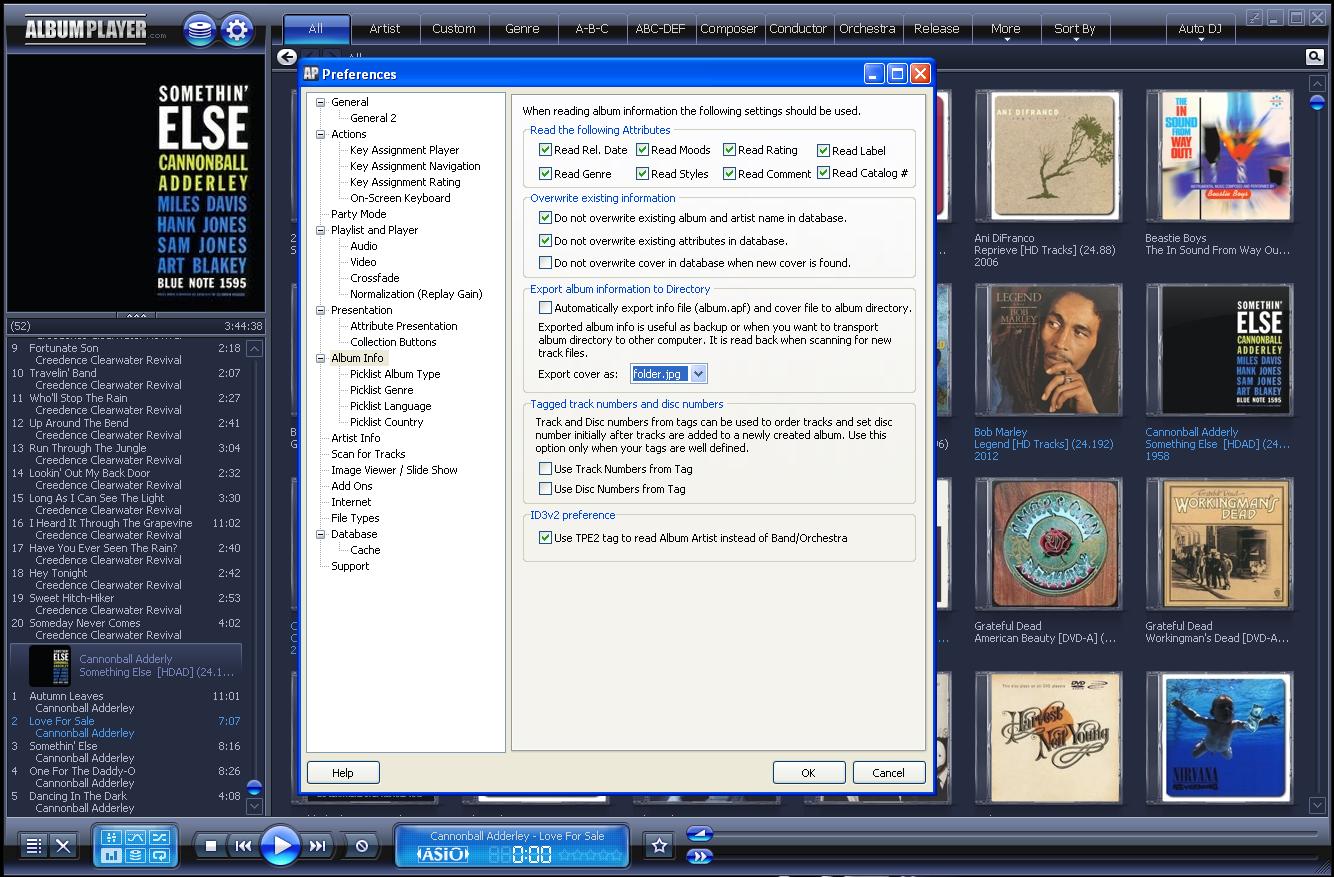
NOTE: Make sure to UNCHECK all the boxes under the heading "Second Step: Find album info" except for the top two options. Specifically, you should check "Read file tags" and "Look for cover in album directory". This way AP does not replace your personal cover art and track information you added to your music folders when ripping with EAC!!! Also, make sure to play around with the settings under the "Preferences" menu under the "Album Info" heading below. If you do not check the boxes "Do not overwrite existing album and artist name in database" and "Do not overwrite existing attributes in database" and "Do not overwrite cover in database when new cover is found" AP will overwrite your tags/ album art you placed in your files folder when ripping in EAC!!! Another handy feature within AP is the option to add the 'album.apf' file to your music folders. This allows you to transfer music to several machines and keep your attributes the same so you don't have to edit each computer's music. Check the box "Automatically export info file (album.apf) and cover file to album directory" to accomplish this.
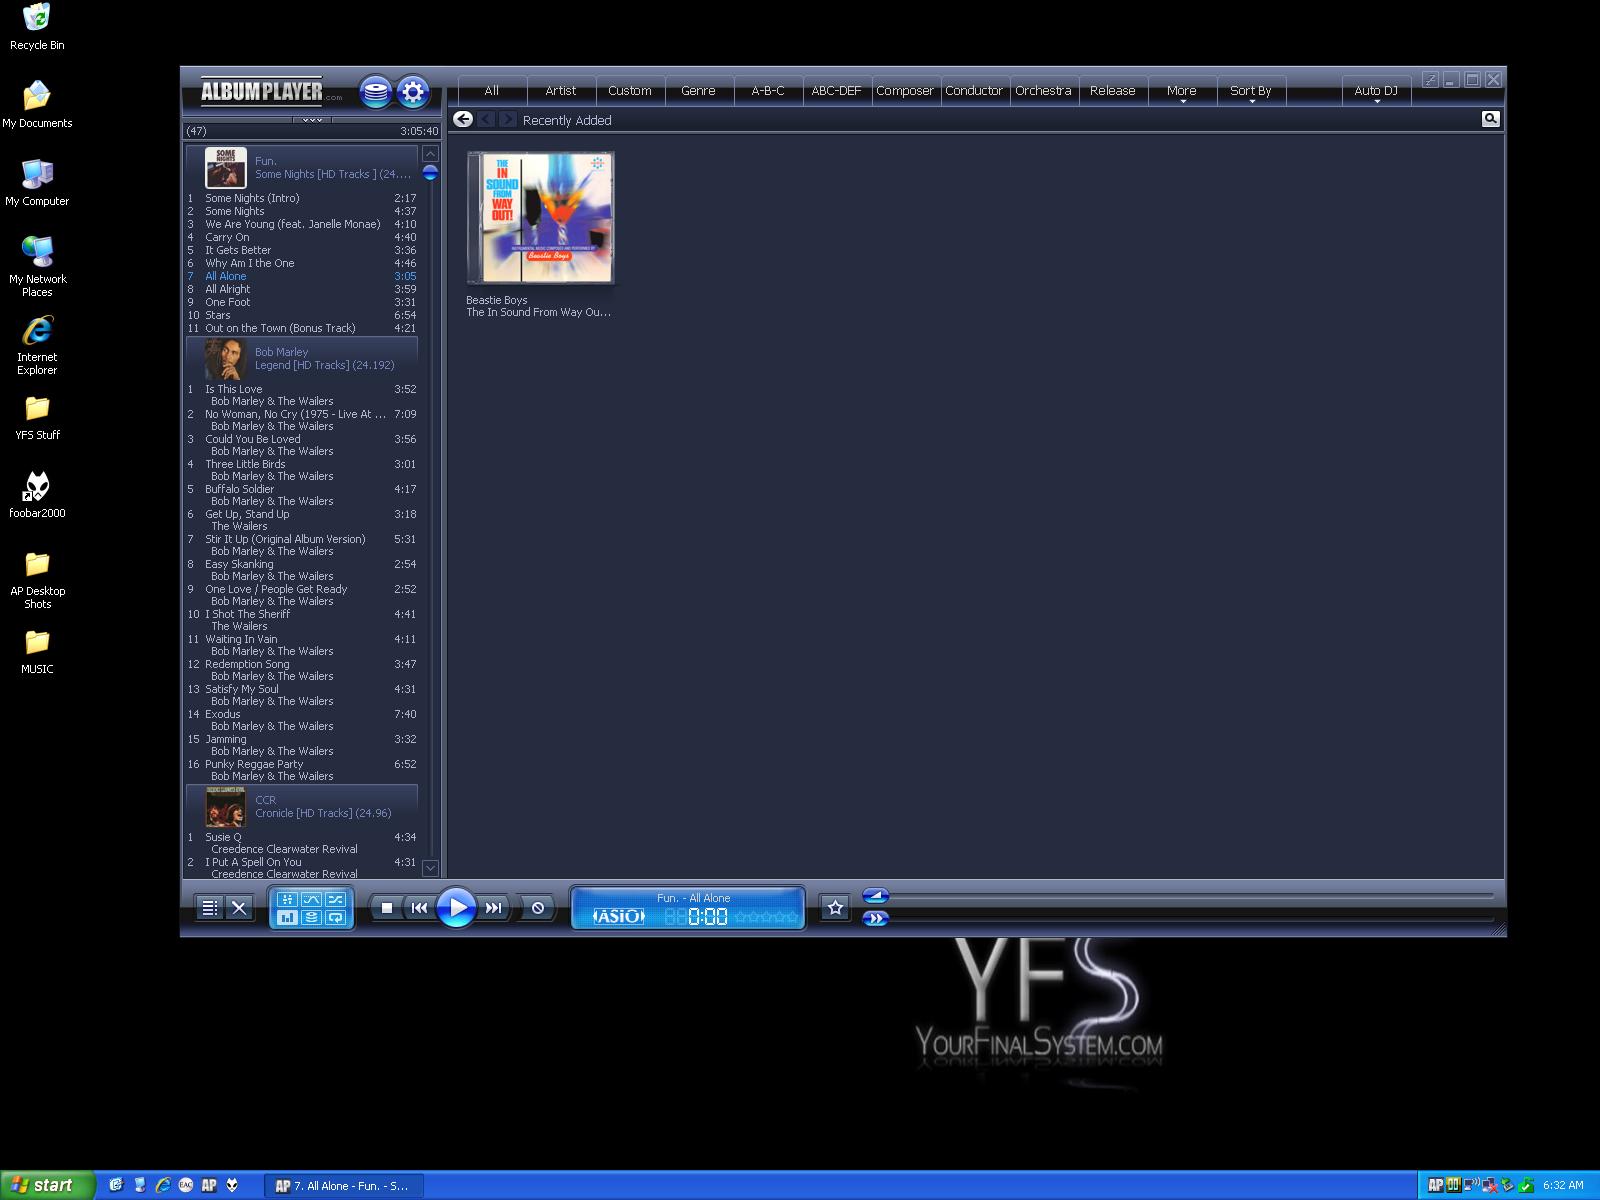
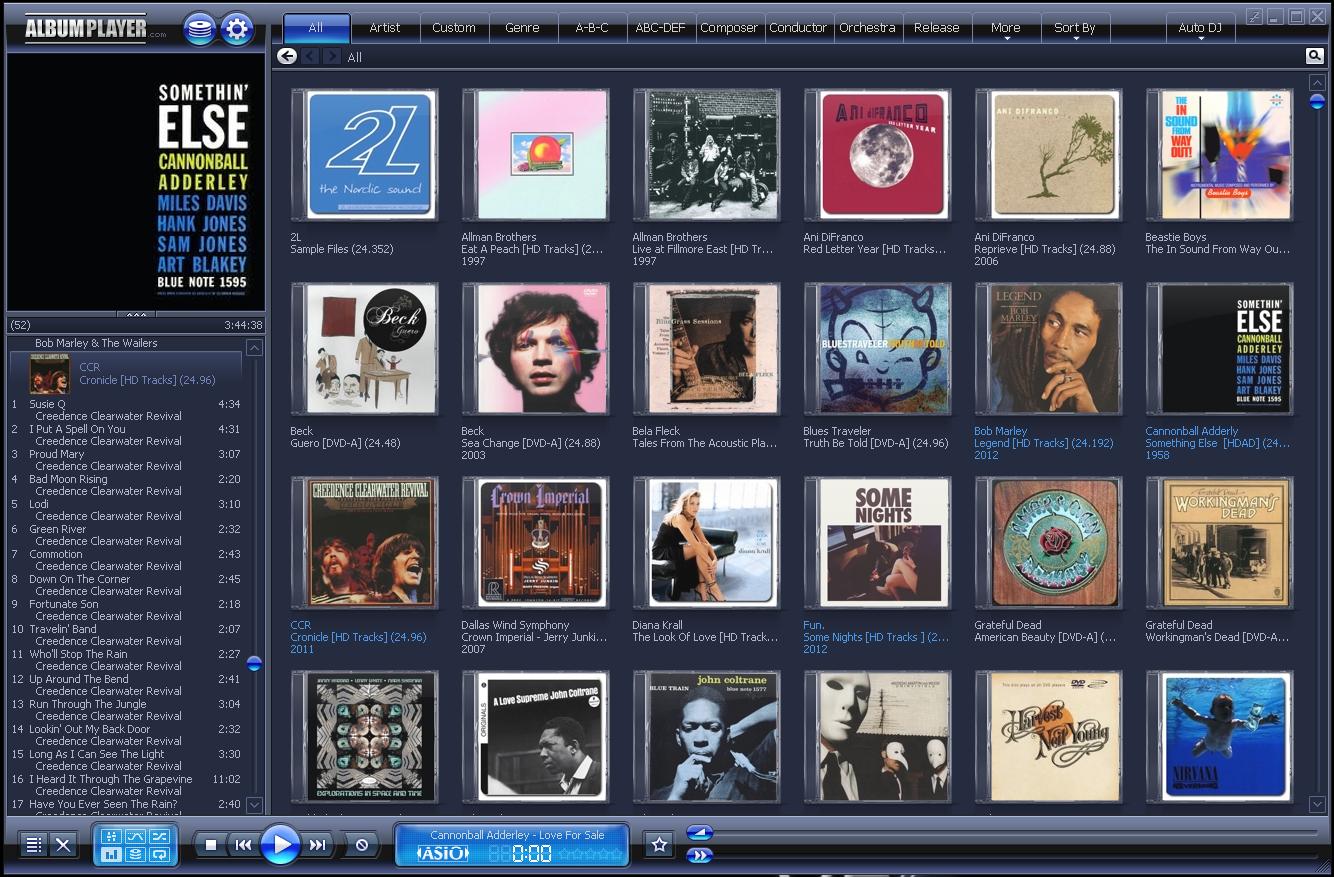
AP automatically shows you the recent files you just added. Click on the "ALL" tab at the top of the window below just above the recently added album. Now you can see your entire collection. You can point AP to your MUSIC folder and it will scan all your music but it will add duplicate albums if you don't point it to the exact albums you rip every time you want to add another album. That's another feature we wish was different. Such is life!
It's a little tricky at first but you'll get the hang of it. Deleting albums from AP is just as tricky. The cool thing is, it won't delete any music from your hard drive, just from its own program database.
DELETING ALBUMS:
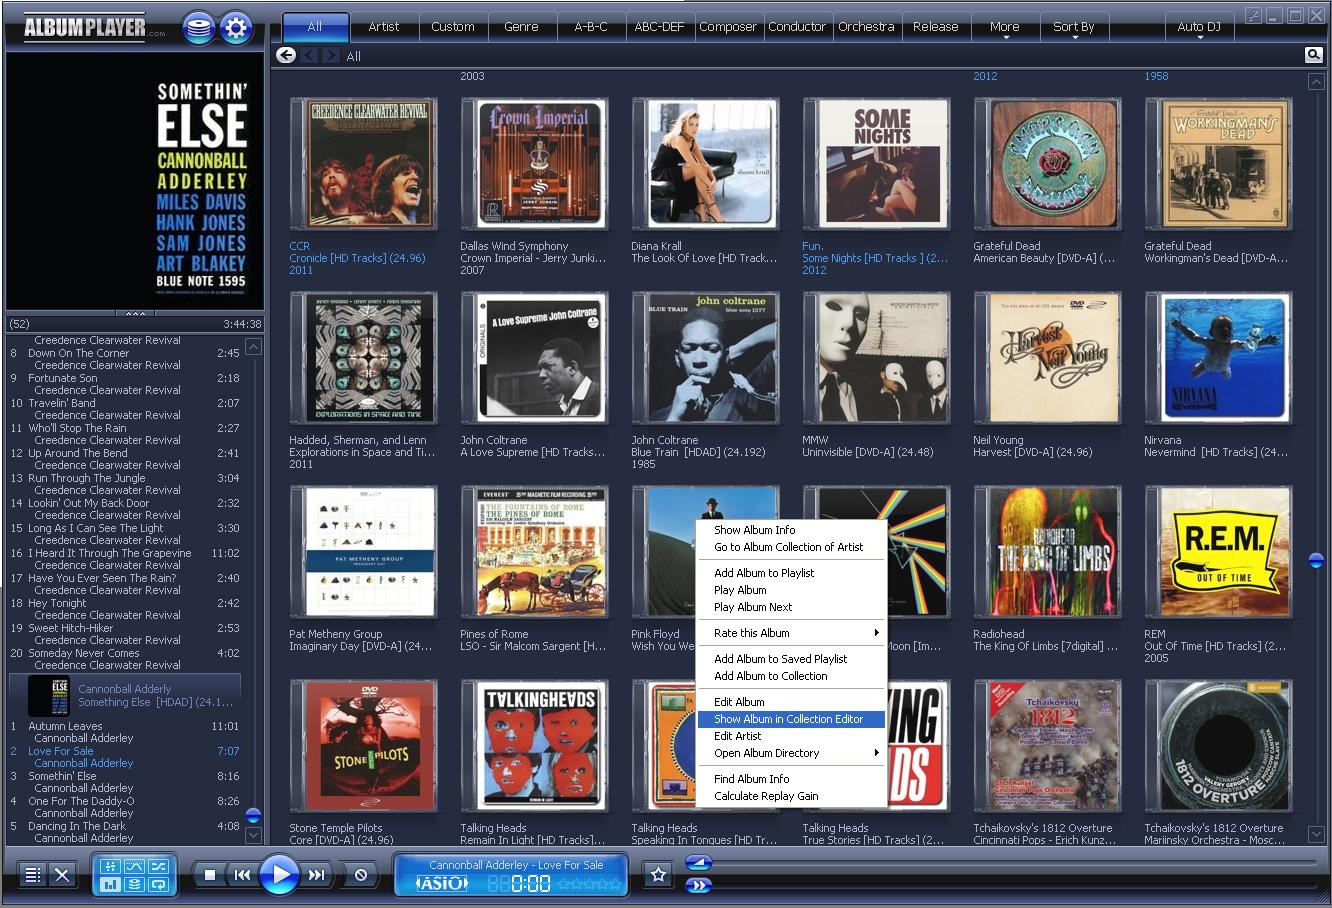
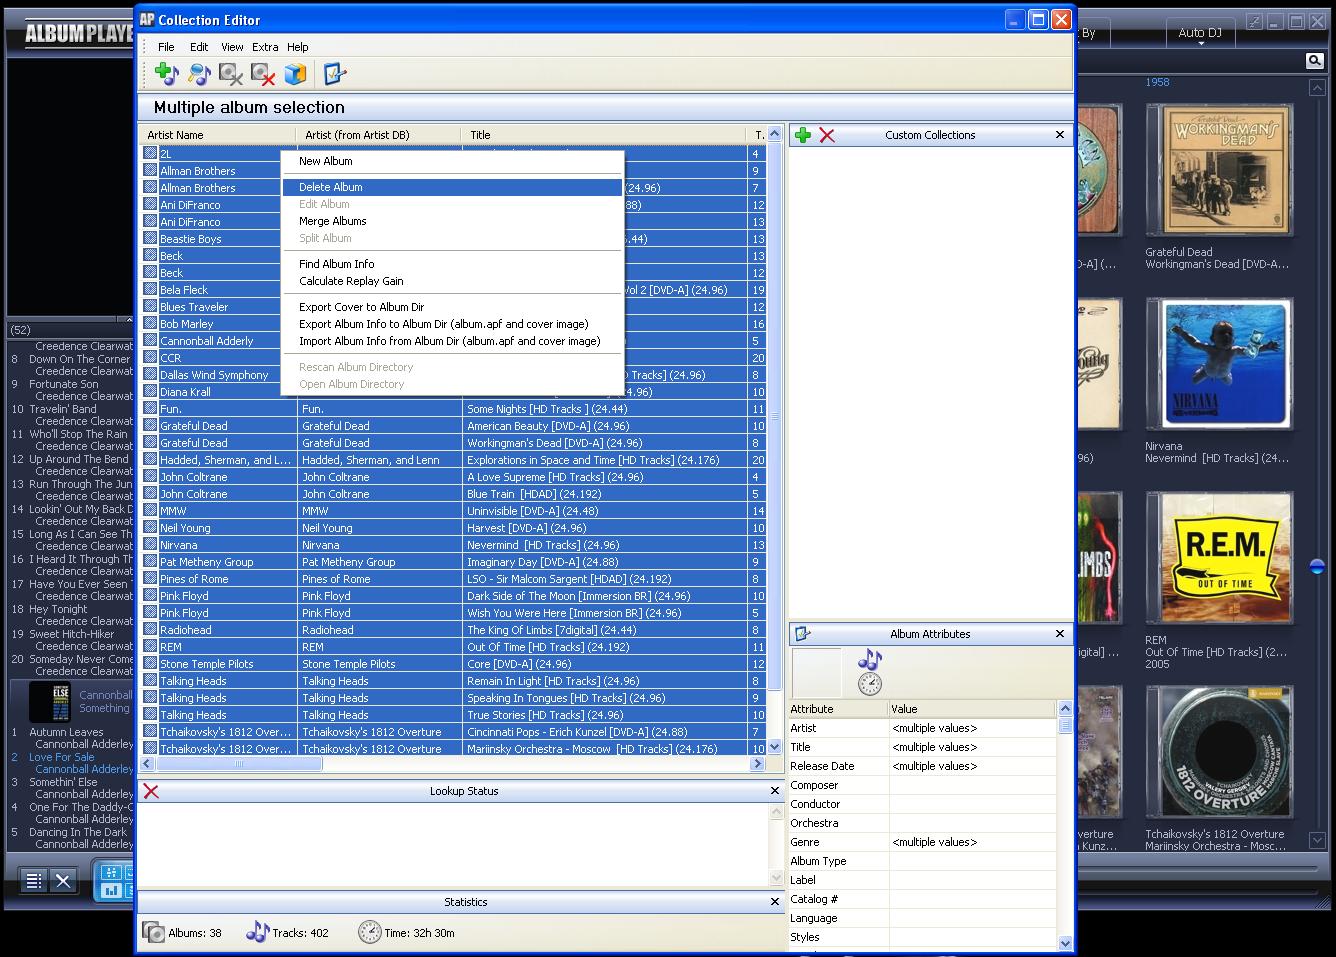
To delete albums within AP, you'll have to access the "Collection Editor". Right-click on an album within AP to get the "Collection Editor" window to pop up. See the screen shot below.
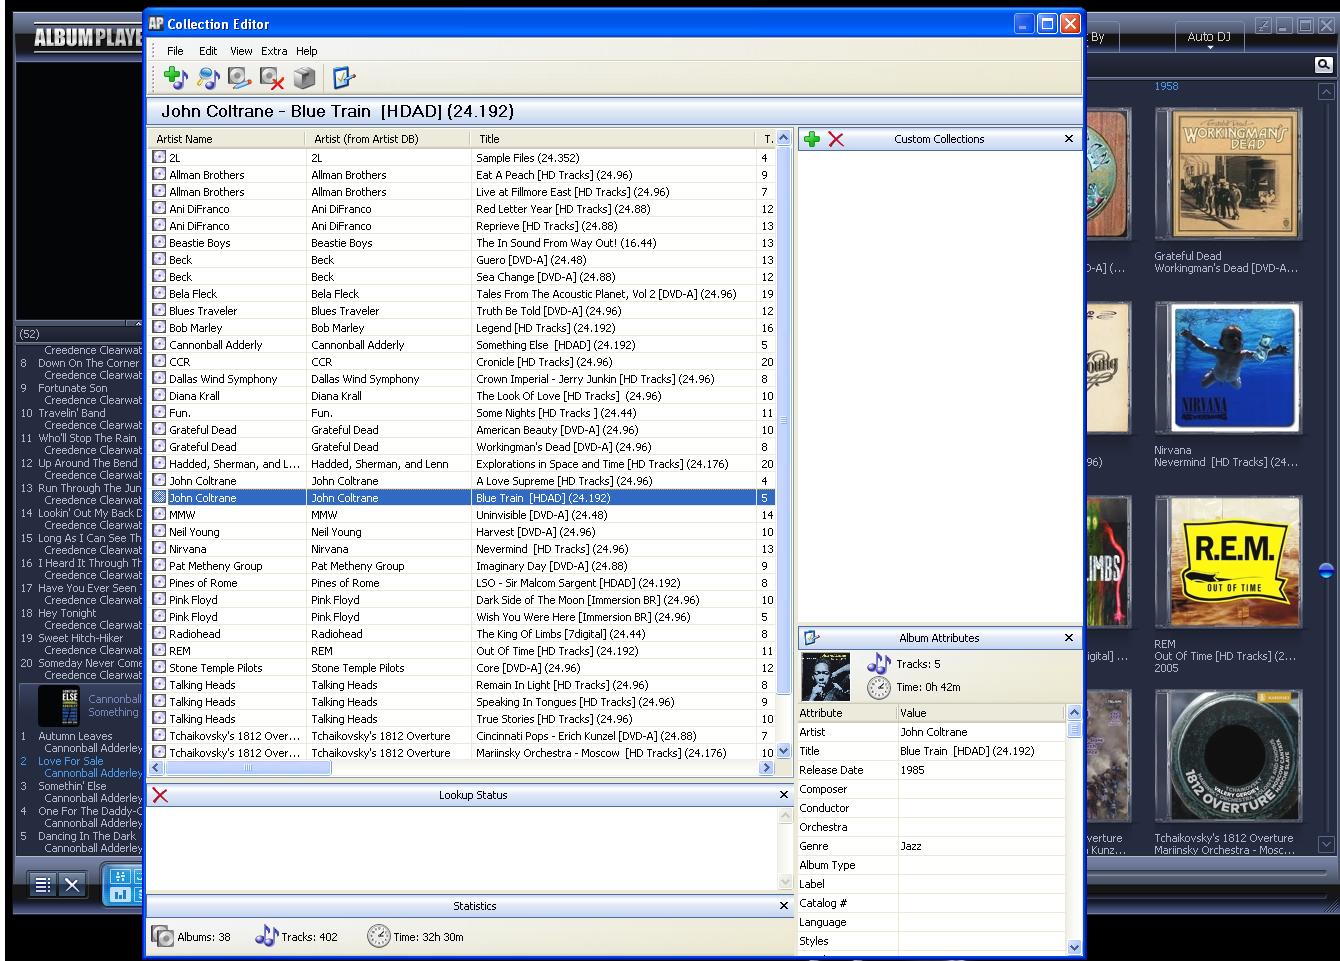
Now you need to manipulate the albums you want to from the "Collection Editor" window as shown below.
I chose to highlight a single album to delete. Right click on the album you'd like to get rid of and then click "Delete". That should remove it from the AP database. This is very handy when you accidentally add duplicate albums or you prefer to add albums in batches. You can go into the "Collection Editor" and select the duplicate albums and just delete them if that makes adding your music faster. It's all personal preference.
You can obviously delete your entire collection by clicking on your last album, holding down the "SHIFT" key, and then clicking on the first album to highlight them all. This is shown below. Remember, you are only altering your AP database, NOT THE FILES ON YOUR HARD DISC! This is very cool considering you will NEVER delete your original files you ripped or downloaded by editing them within AP. We like this feature!
This method of deleting the entire collection is handy when you just want to add several albums you've ripped/ downloaded and you don't want any duplicates. Instead of pointing AP to the multiple albums you've added to your hard disc, you can delete them all and then just point AP to the entire folder your music lives in. This will allow you to add music VERY quickly in two steps instead of multiple steps.
MODIFYING ALBUMS/ EDITING ALBUM ATTRIBUTES:
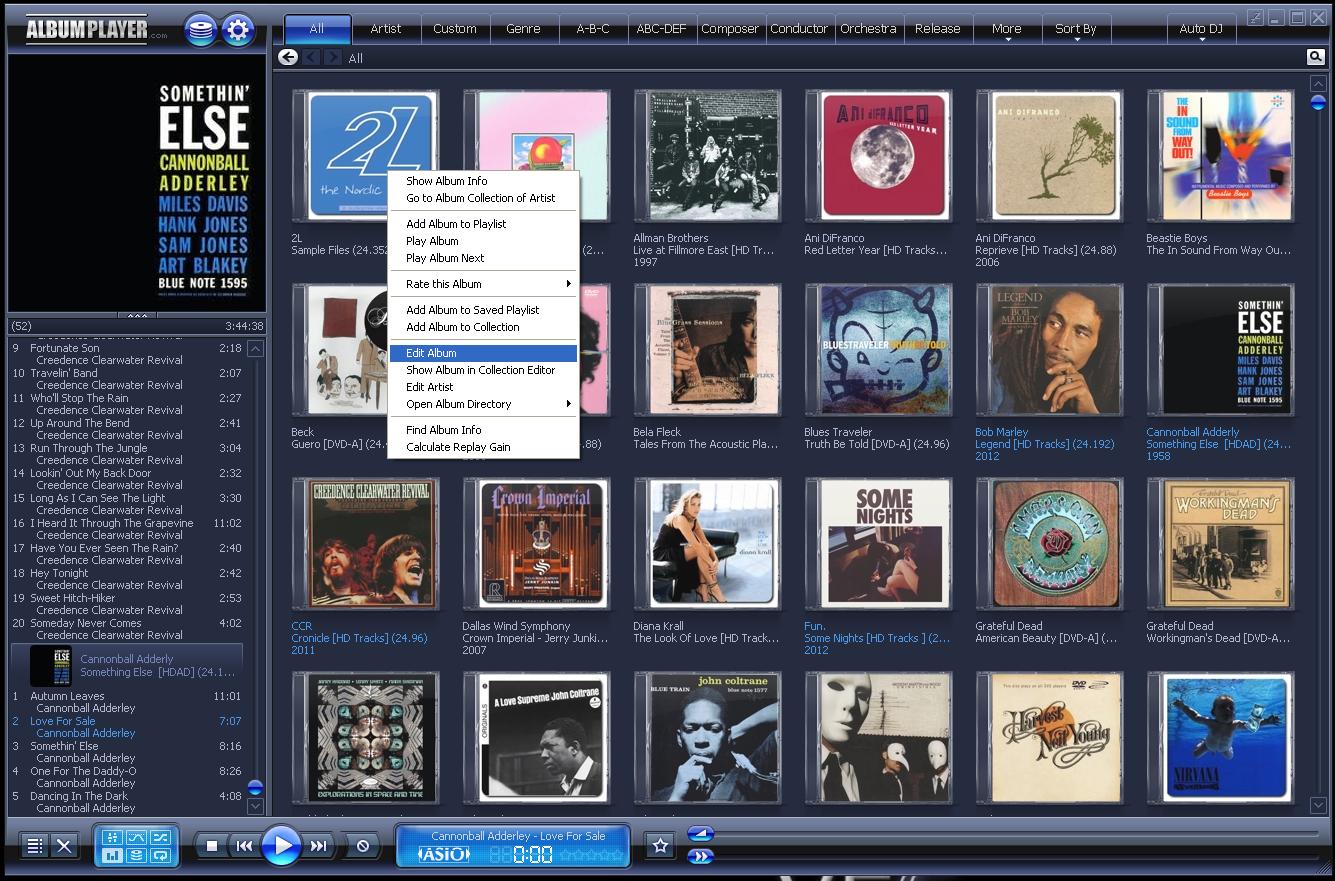
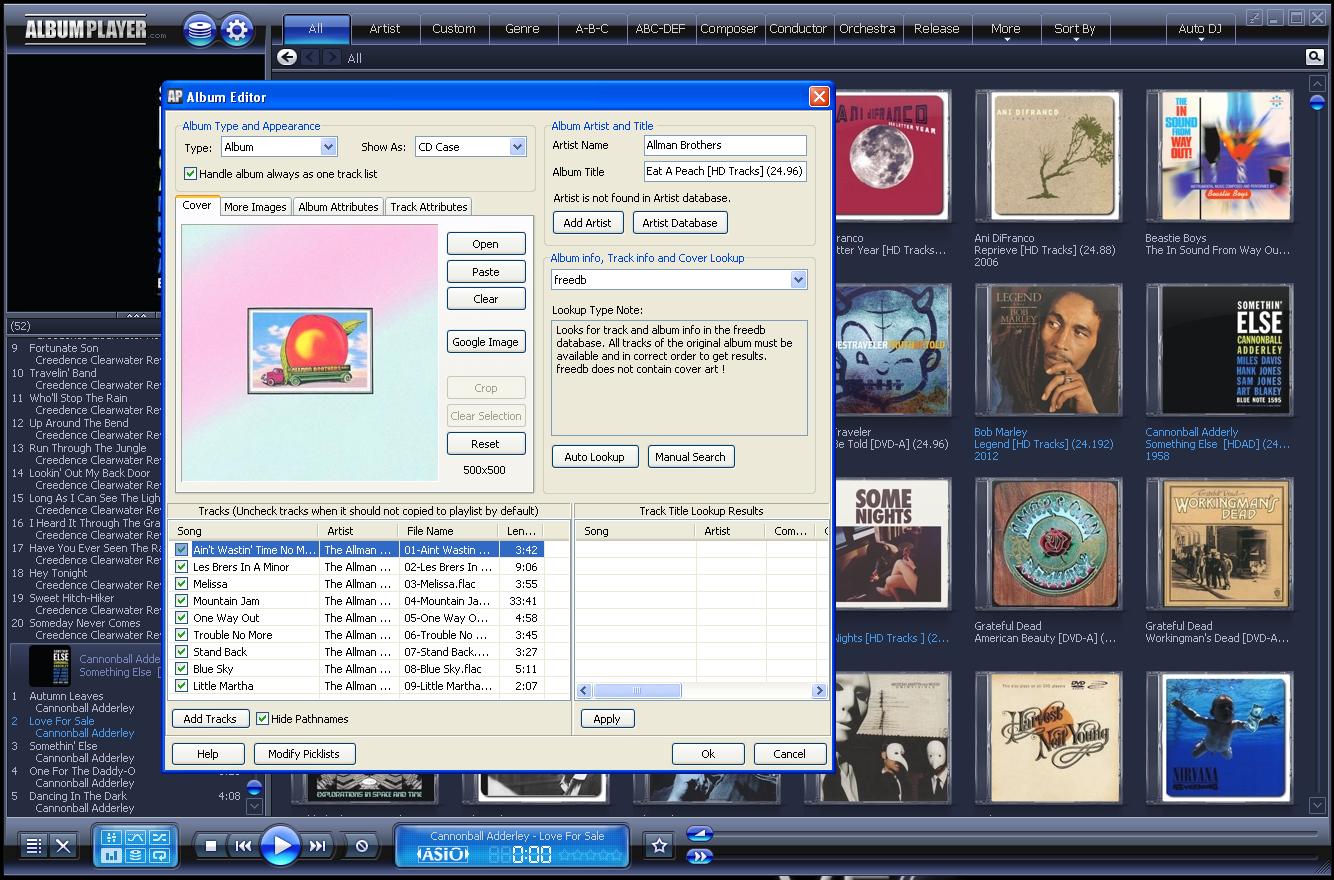
In this final section of our AP FAQ, we show the user how to edit album art, track information, as well as album titles and artist information. In order to edit your albums within AP you'll need to right-click on the album you specifically want to edit. See the screen shot below.
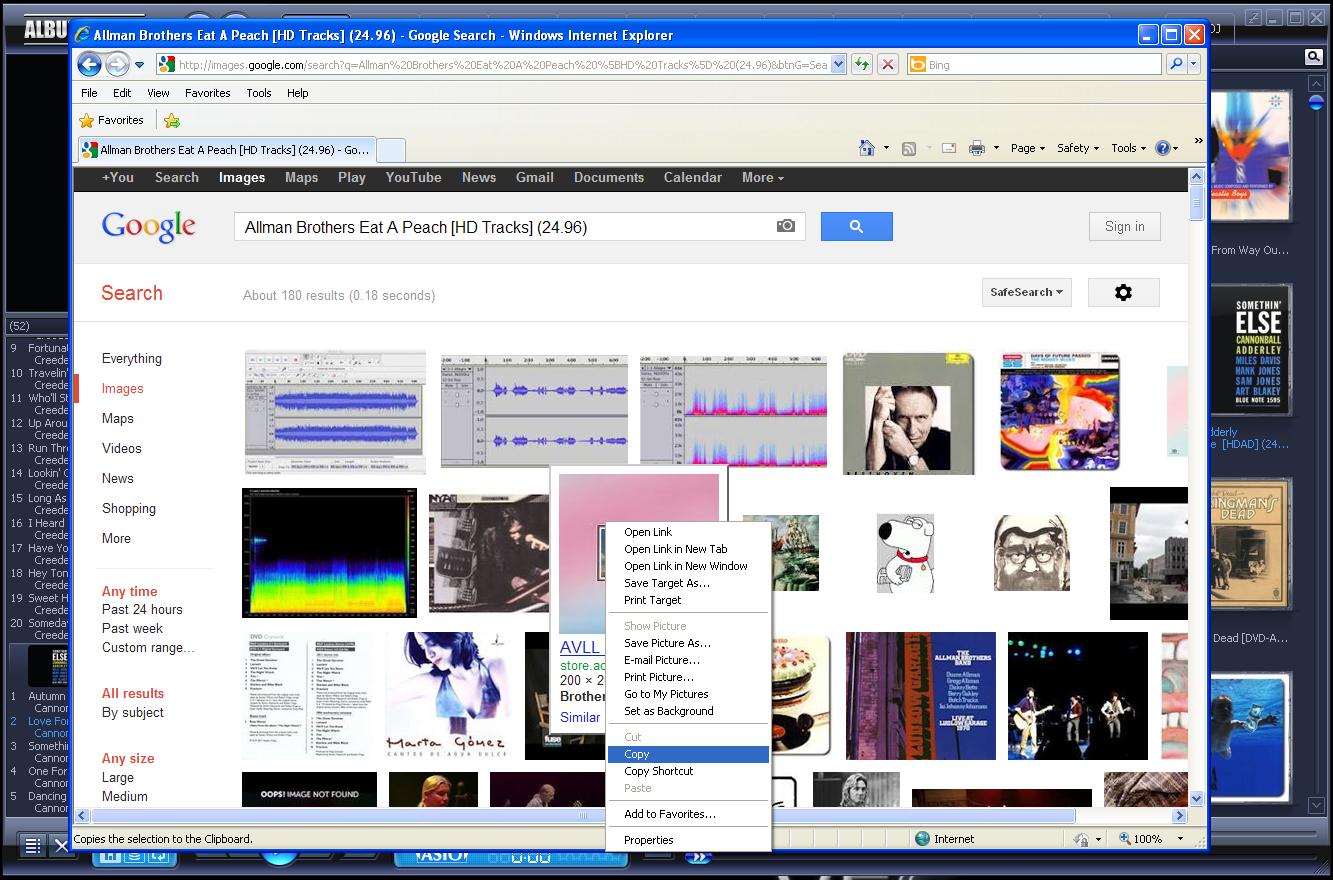
Now you're going to need to go into the album attributes menu where you can edit track names as well as the album art and other album attributes such as the album name and artist. We like to just use the track name for each track instead of the entire name EAC provides after each rip. You can set up EAC to use just the album track name and omit the artist and album info. This is HIGHLY recommended!!! See below for a screen shot of the album attributes menu window. You need to hit the "Google Image" button and that will take you to the Google Images web page. You can search for your cover art if you'd like to modify or change what AP came up with after scanning your files.
You may have to re-enter the search term at the very top of the Google Images page. This way you can find the correct album art. You may have to play around with search terms until you find your correct art. Once you have found the correct album cover on the Google Images page, right-click on the cover art picture and hit "COPY".
Go back to the album attributes window and hit the "Paste" button next to the album cover. This will add the album art you just copied in the Google Images web page. PRETTY SLICK! If you already downloaded album cover art from EAC and you know it's in your album folder already, you can hit the "Open" button above the "Paste" button and you can select the cover art that is already contained in the album folder on your hard drive. I wanted to show the user how to find cover art if they didn't download it while they were ripping. It's easier to just hit the "Open" button and point AP to the cover art within your folder. This is what you would do if you downloaded an album from HD Tracks and it didn't show up correctly.
Remember the album attributes window above is where you need to change ALL the album info you see in AP. There's no other place to do this. You can click on the track names and the tag editor comes up where the album art is located in the pic above. The top right-hand corner of the album attributes window is where you would change the name of the artist and album to read exactly what you want within AP. You can also modify how the album 'appears' in your playlist. The default setup shows a CD case around your album artwork. We change the border to look like a vinyl album cover when we have
needle-drops in our collection. This is accomplished by changing the "Show as" menu above the album cover in the screen shot above. There are several options to choose from. You should be able to get the hang of all this after a little while. With more and more practice it will become easier to navigate through AP's menus.
THANKS for reading and we hope this tutorial helps our users navigate through the AP waters a little easier.
Until next time...
-KOB